生活百科

js

帖子:2
精华:0
积分:4
注册:2021-04-21
使用C#.Net创建Windows服务的方法
Microsoft Windows 服务能够创建在它们自己的 Windows 会话中可长时间运行的可执行应用程序。这些服务可以在计算机启动时自动启动,可以暂停和重新启动而且不显示任何用户界面。这使服务非常适合在服务器上使用,或任何时候,为了不影响在同一台计算机上工作的其他用户,需要长时间运行功能时使用。还可以在不同于登录用户的特定用户帐户或默认计算机帐户下运行服务。
一、创建Windows 服务
1.新建一个Windows 服务,并将项目名称改为“WindowsServiceDemo”,如下图所示:

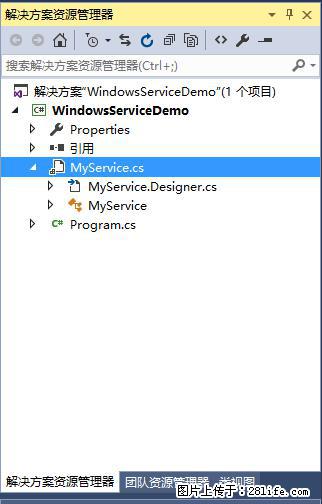
2.在解决方案资源管理器内将Service1.cs改为MyService.cs后并点击“查看代码”图标按钮进入代码编辑器界面,如下图所示:
3.在代码编辑器内如入以下代码,如下所示:
using System;
using System.ServiceProcess;
using System.IO;
namespace WindowsServiceDemo
{
public partial class MyService : ServiceBase
{
public MyService()
{
InitializeComponent();
}
string filePath = @"D:\MyServiceLog.txt";
protected override void OnStart(string[] args)
{
using (FileStream stream = new FileStream(filePath, FileMode.Append))
using (StreamWriter writer = new StreamWriter(stream))
{
writer.WriteLine($"{DateTime.Now},服务启动!");
}
}
protected override void OnStop()
{
using (FileStream stream = new FileStream(filePath, FileMode.Append))
using (StreamWriter writer = new StreamWriter(stream))
{
writer.WriteLine($"{DateTime.Now},服务停止!");
}
}
}
}
4.双击项目“WindowsServiceDemo”进入“MyService”设计界面,在空白位置右击鼠标弹出上下文菜单,选中“添加安装程序”,如下图所示:

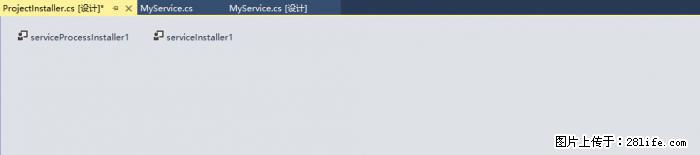
5.此时软件会生成两个组件,分别为“serviceInstaller1”及“serviceProcessInstaller1”,如下图所示:
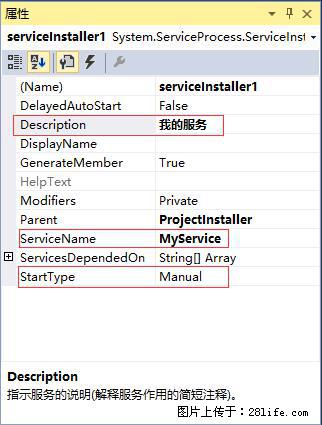
6.点击“serviceInstaller1”,在“属性”窗体将ServiceName改为MyService,Description改为我的服务,StartType保持为Manual,如下图所示:
7.点击“serviceProcessInstaller1”,在“属性”窗体将Account改为LocalSystem(服务属性系统级别),如下图所示:

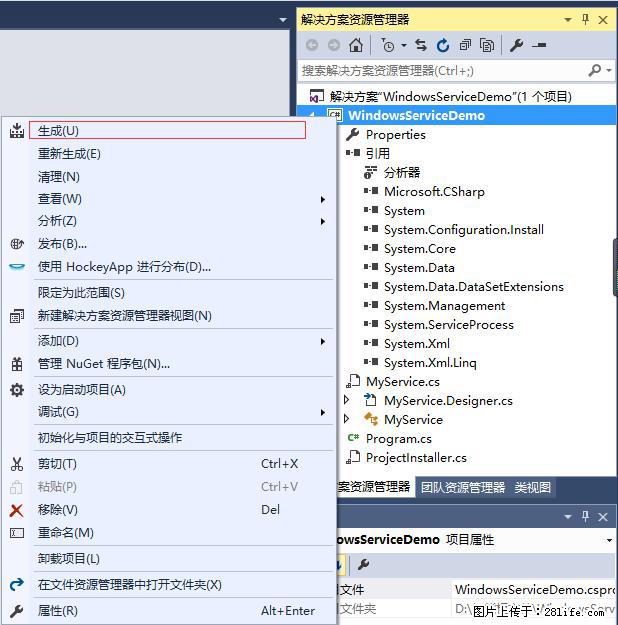
8.鼠标右键点击项目“WindowsServiceDemo”,在弹出的上下文菜单中选择“生成”按钮,如下图所示:
9.至此,Windows服务已经创建完毕。
二、创建安装、启动、停止、卸载服务的Windows窗体
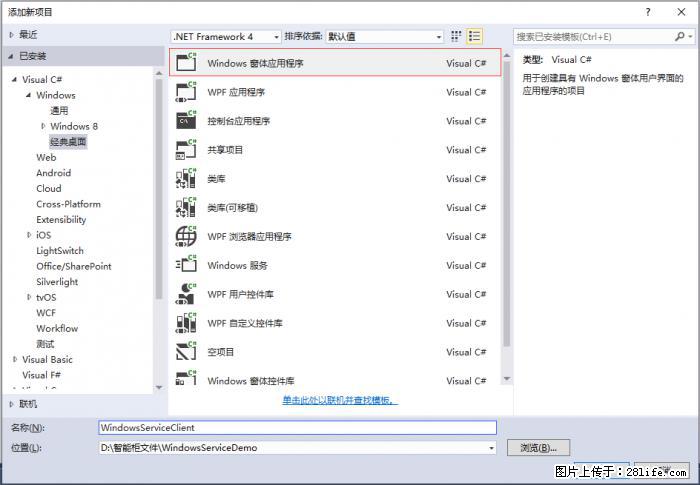
1.在同一个解决方案里新建一个Windows Form项目,并命名为WindowsServiceClient,如下图所示:
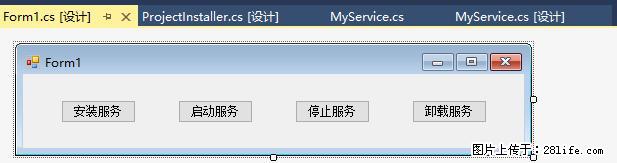
2.将该项目设置为启动项目,并在窗体内添加四个按钮,分别为安装服务、启动服务、停止服务及卸载服务,如下图所示:
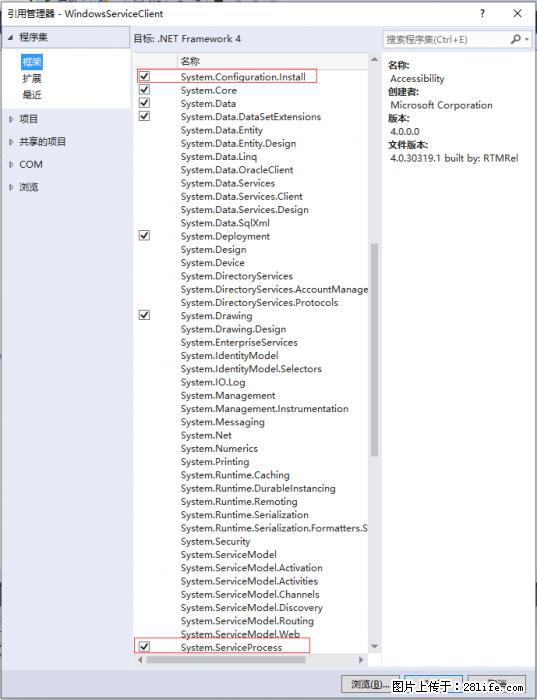
3.按下F7进入代码编辑界面,添加引用“System.ServiceProcess”及“System.Configuration.Install”,并输入如下代码:
using System;
using System.Collections;
using System.Windows.Forms;
using System.ServiceProcess;
using System.Configuration.Install;
namespace WindowsServiceClient
{
public partial class Form1 : Form
{
public Form1()
{
InitializeComponent();
}
string serviceFilePath = $"{Application.StartupPath}\WindowsServiceDemo.exe";
string serviceName = "MyService";
//事件:安装服务
private void button1_Click(object sender, EventArgs e)
{
if (this.IsServiceExisted(serviceName)) this.UninstallService(serviceName);
this.InstallService(serviceFilePath);
}
//事件:启动服务
private void button2_Click(object sender, EventArgs e)
{
if (this.IsServiceExisted(serviceName)) this.ServiceStart(serviceName);
}
//事件:停止服务
private void button3_Click(object sender, EventArgs e)
{
if (this.IsServiceExisted(serviceName)) this.ServiceStop(serviceName);
}
//事件:卸载服务
private void button4_Click(object sender, EventArgs e)
{
if (this.IsServiceExisted(serviceName))
{
this.ServiceStop(serviceName);
this.UninstallService(serviceFilePath);
}
}
//判断服务是否存在
private bool IsServiceExisted(string serviceName)
{
ServiceController[] services = ServiceController.GetServices();
foreach (ServiceController sc in services)
{
if (sc.ServiceName.ToLower() == serviceName.ToLower())
{
return true;
}
}
return false;
}
//安装服务
private void InstallService(string serviceFilePath)
{
using (AssemblyInstaller installer = new AssemblyInstaller())
{
installer.UseNewContext = true;
installer.Path = serviceFilePath;
IDictionary savedState = new Hashtable();
installer.Install(savedState);
installer.Commit(savedState);
}
}
//卸载服务
private void UninstallService(string serviceFilePath)
{
using (AssemblyInstaller installer = new AssemblyInstaller())
{
installer.UseNewContext = true;
installer.Path = serviceFilePath;
installer.Uninstall(null);
}
}
//启动服务
private void ServiceStart(string serviceName)
{
using (ServiceController control = new ServiceController(serviceName))
{
if (control.Status == ServiceControllerStatus.Stopped)
{
control.Start();
}
}
}
//停止服务
private void ServiceStop(string serviceName)
{
using (ServiceController control = new ServiceController(serviceName))
{
if (control.Status == ServiceControllerStatus.Running)
{
control.Stop();
}
}
}
}
}
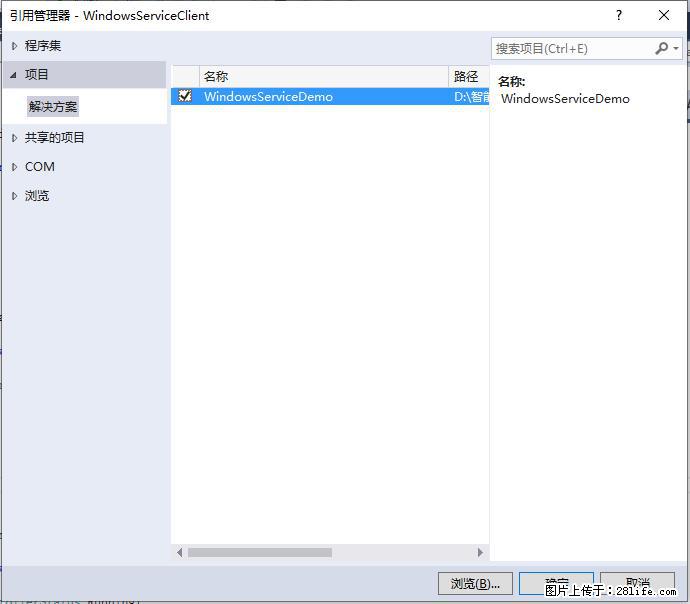
4.为了后续调试服务及安装卸载服务的需要,将已生成的WindowsServiceDemo.exe引用到本Windows窗体,如下图所示:
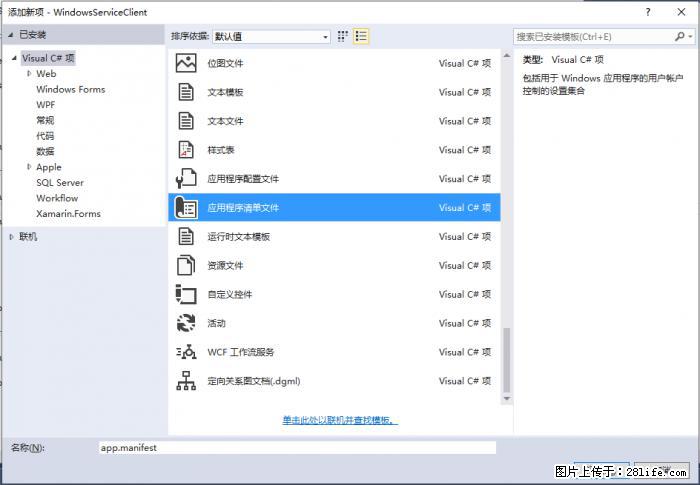
5.由于需要安装服务,故需要使用UAC中Administrator的权限,鼠标右击项目“WindowsServiceClient”,在弹出的上下文菜单中选择“添加”->“新建项”,在弹出的选择窗体中选择“应用程序清单文件”并单击确定,如下图所示:
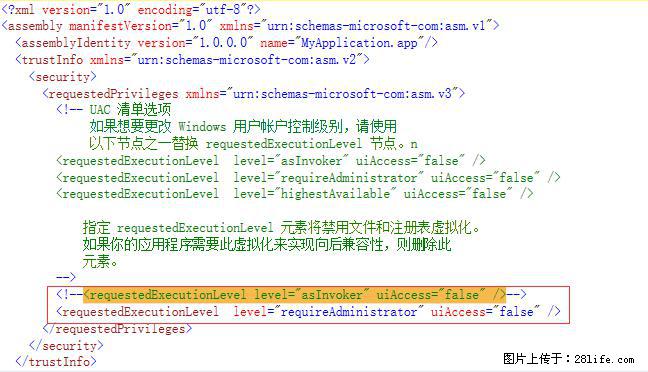
6.打开该文件,并将改为,如下图所示:
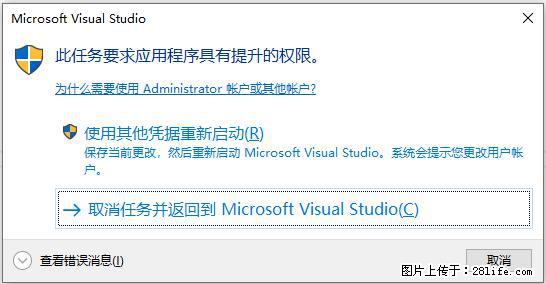
7.IDE启动后,将会弹出如下所示的窗体(有的系统因UAC配置有可能不显示),需要用管理员权限打开:
8.重新打开后,在IDE运行WindowsServiceClient项目;
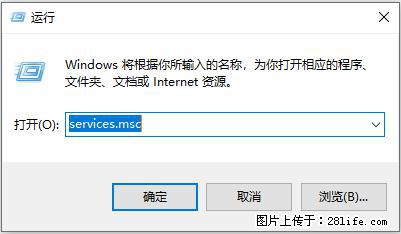
9.使用WIN+R的方式打开运行窗体,并在窗体内输入services.msc后打开服务,如下图所示:
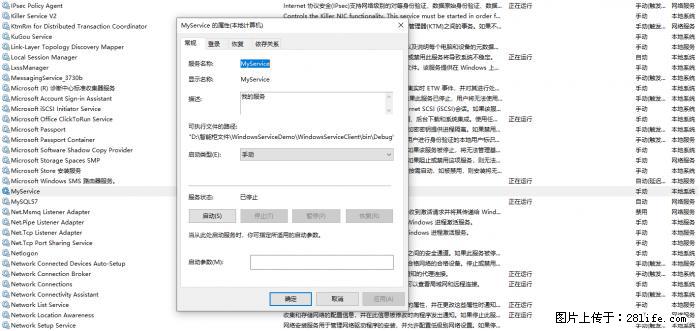
10.运行程序"Form1"点击窗体内的“安装服务”按钮,将会在服务中出现MyService,如下图所示:
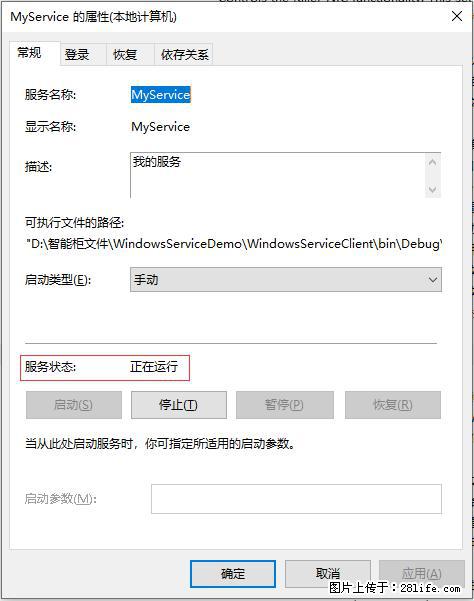
11.点击“运行服务”按钮,将启动并运行服务,如下所示:
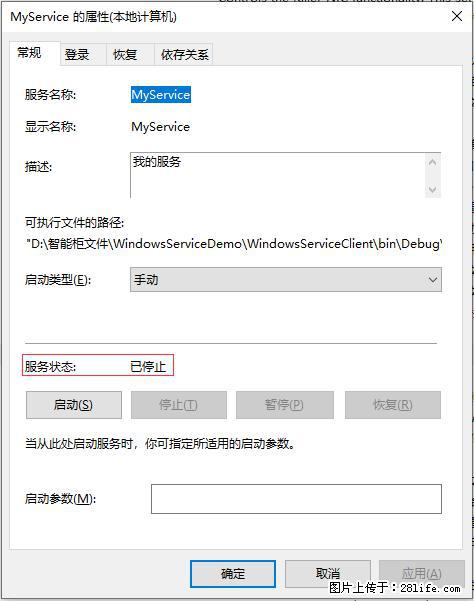
12.点击“停止服务”按钮,将会停止运行服务,如下图所示:
13.点击“卸载服务”按钮,将会从服务中删除MyService服务。
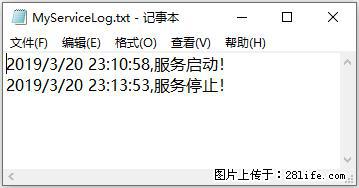
14.以上启动及停止服务将会写入D:\MyServiceLog.txt,内容如下所示:

查看移动版
← 扫码查看移动版【转发给朋友】或【分享到朋友圈】
1、查看方法:使用手机微信扫描二维码,打开本页移动端页面。
2、分享方法:在打开的本页移动端页面,点击右上角的“...”,选择【转发给朋友】或【分享到朋友圈】即可。
2、分享方法:在打开的本页移动端页面,点击右上角的“...”,选择【转发给朋友】或【分享到朋友圈】即可。

关注公众号
